
How to Build an AI-Powered Drone
How to Build an AI-Powered Drone: A Complete Guide from Concept to Flight
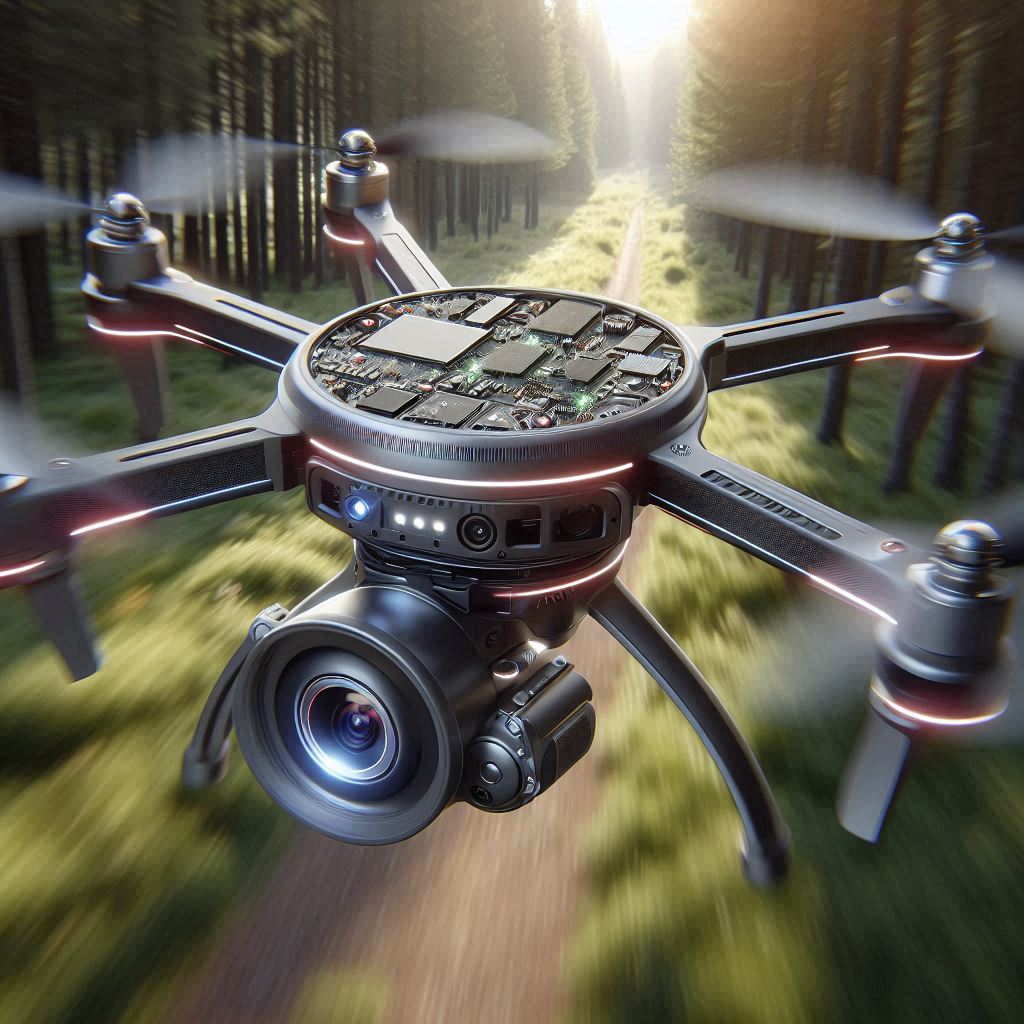
When Jake was twelve, he duct-taped an old webcam to a plastic toy helicopter. It was a Frankenstein creation that never got off the ground, but the spark had been lit. A decade later, Jake was flying a sleek, AI-powered drone over dense forest trails, capturing footage for a wildlife research project. What had once been a child’s dream had transformed into a powerful tool with the potential to change industries.
Jake’s story isn’t unique. Every year, thousands of hobbyists and innovators dream of building their own drone. With the rise of artificial intelligence and more accessible hardware, turning that dream into a reality is easier than ever. But where do you begin? What components do you need? How do you train a drone to think on its own?
This guide will walk you through the journey of building an AI-powered drone from scratch. Whether you are a curious beginner or a tech-savvy creator, this article will give you a complete roadmap to designing, building and deploying a smart drone that can do more than just fly.
Read More: Empowering Educators: Unleashing the Potential of AI Tools for Creating Engaging Educational Content
Why AI-Powered Drones Are the Future
Traditional drones follow pre-programmed instructions or respond to manual controls. But AI-powered drones go further. They can:
- Navigate environments autonomously
- Recognize objects and people
- Avoid obstacles in real time
- Learn from flight data to improve performance
- Capture and analyze visual information for various tasks
From agriculture and environmental monitoring to filmmaking and security, AI drones are redefining what’s possible.
Step 1: Define Your Purpose and Use Case
Before you start buying parts or writing code, you need to know what your drone is meant to do. Ask yourself:
- Will it be used for aerial photography or real-time object detection?
- Does it need to fly long distances or operate in tight spaces?
- Will it work indoors or outdoors?
- Should it track humans, identify vehicles, or map terrain?
Knowing your goal will influence every technical decision that follows, from frame design to onboard processors.
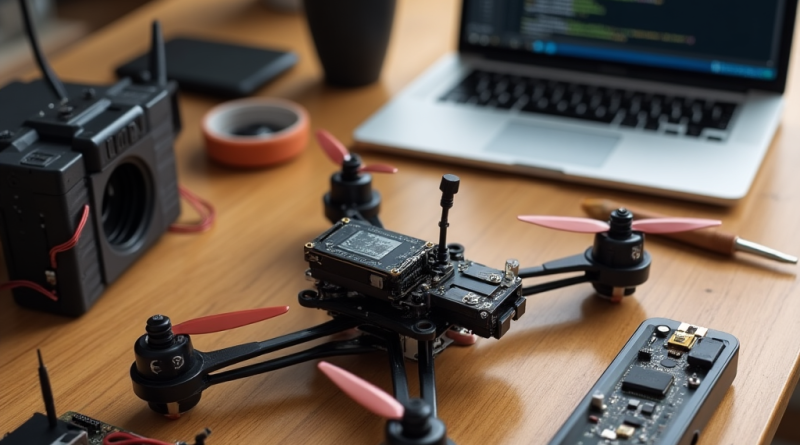
Step 2: Choose the Right Hardware
Here’s a breakdown of the key components you’ll need:
1. Drone Frame
This is the skeleton of your drone. For AI applications, use a frame that can support extra weight (like sensors and onboard computers) and has space for additional wiring.
2. Motors and Propellers
Choose brushless motors for better efficiency and reliability. Match your propellers to your drone’s weight and intended speed.
3. Electronic Speed Controllers (ESCs)
ESCs regulate the speed of each motor. Make sure they’re compatible with your chosen motors and battery.
4. Flight Controller
This is the brain of the drone for basic stabilization and control. Popular options include the Pixhawk or Betaflight-compatible controllers.
5. Onboard Computer (for AI)
This is where the AI magic happens. Consider small but powerful single-board computers like the NVIDIA Jetson Nano, Jetson Xavier NX, or Raspberry Pi 4. These can run machine learning models in real-time.
6. Camera and Sensors
Use a camera module (e.g., Raspberry Pi Camera, Intel RealSense, or ZED stereo cameras) and add sensors such as LiDAR or ultrasonic distance sensors for spatial awareness.
7. Power Supply
A LiPo (Lithium Polymer) battery is the go-to choice. Make sure it can power all your components without overheating or draining too fast.
Step 3: Assemble the Drone
Assembly requires patience and precision. Start by mounting the motors onto the frame, followed by the ESCs. Connect your flight controller and route the wiring carefully to avoid interference. Attach the camera and other sensors securely to reduce vibration.
Once the hardware is set, test the power connections and calibrate your flight controller using software like Mission Planner or QGroundControl.
Read More: Your AI Personal Trainer: Crafting Custom Home Workouts with Intelligent Software
Step 4: Program the AI System
Here’s where your drone becomes intelligent.
1. Choose a Programming Language
Python is ideal due to its rich ecosystem for AI development.
2. Set Up Your Environment
Install essential libraries such as:
- OpenCV for computer vision
- TensorFlow or PyTorch for deep learning
- ROS (Robot Operating System) for sensor communication
3. Train Your AI Model
Let’s say your drone needs to identify people. Use datasets like COCO or ImageNet to train a Convolutional Neural Network (CNN). Alternatively, use pre-trained models like YOLO (You Only Look Once) for object detection.
4. Integrate with Real-Time Feed
Use the camera’s video feed to run inference with your AI model. Based on what the model detects, send navigation commands to the flight controller. This creates a feedback loop where the drone sees, thinks and acts.
Step 5: Implement Navigation and Obstacle Avoidance
Autonomous flight needs more than object detection. Your drone should be able to find its way without crashing into walls or trees.
Use algorithms like:
- SLAM (Simultaneous Localization and Mapping)
- A* Pathfinding
- Optical Flow
Combine GPS data with sensor feedback for intelligent routing. Libraries such as DroneKit-Python or MAVSDK can help you control flight paths and behavior.
Step 6: Test in a Controlled Environment
Do not take your new AI drone straight into the wild. Start in a wide-open, indoor area or an outdoor field free of obstacles. Begin with manual control to ensure stability, then test basic autonomy functions one at a time.
Monitor heat levels, battery usage, frame vibration and software logs closely. Debug any issues before moving on to more complex tasks.
Step 7: Take Flight and Gather Data
Once you’re confident in your drone’s reliability, let it fly. Use each flight to collect visual and sensor data. Refine your AI model using this new information. Continuous improvement is the secret sauce in machine learning.
Bonus: Advanced Features to Explore
- Voice Command Integration using tools like Google Assistant or Amazon Alexa
- Swarm Intelligence to coordinate multiple drones working together
- Gesture Recognition using real-time hand tracking
- Thermal Imaging for search and rescue or environmental monitoring
Read More: The Digital Appraiser: Leveraging AI for Accurate Online Real Estate Property Valuation
Final Thoughts: Innovation Takes Flight
Building an AI-powered drone is not just a technical project. It is a leap into the future of autonomous systems and smart machines. It challenges you to merge engineering with imagination and gives you a tangible result that flies.
Jake’s journey began with duct tape and dreams. Yours can start today with a screwdriver and code.
Whether you want to build the next tool for environmental conservation or a drone that can dance to music, the sky is no longer the limit.
It’s just the beginning.


Pingback: How to Become a Cloud Engineer in 4 months - Newline Tech
Pingback: How to Build an AI-Powered Robot - Newline Tech
Pingback: How Drones Are Becoming the New Delivery Guys - Latest AI/Tech Info